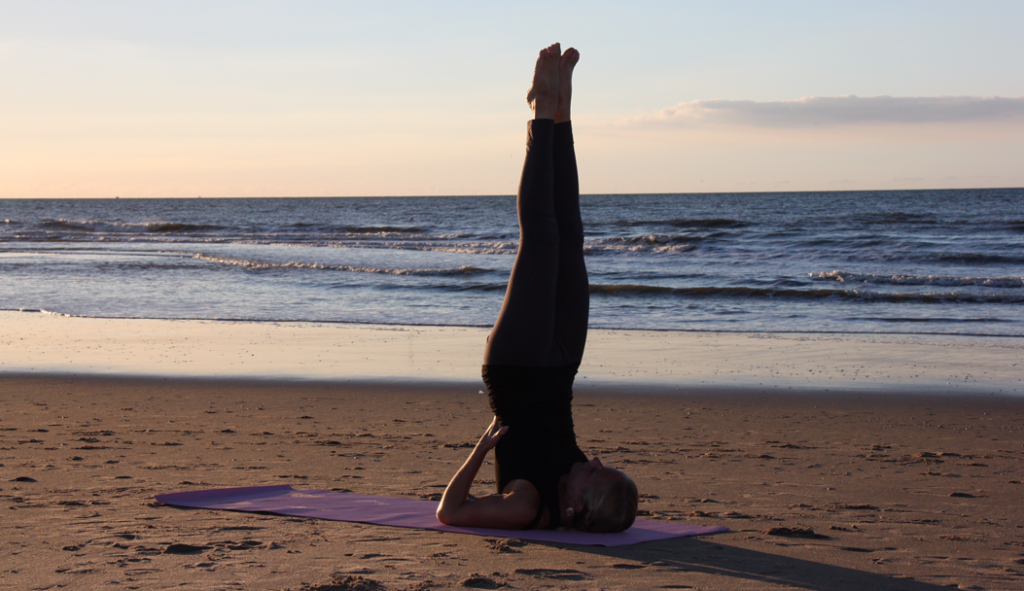
“Oh no, I cannot do that, I will break my neck.” That is often the first reaction when people see this yoga pose. Logically, as the Shoulder pose looks impressive. But this pose is one that everyone can do without breaking his or her neck. Perhaps surprising to hear; the strength for this pose is not in (strong) neck or arm muscles but in the shoulders in combination with a good breathing technique. And by doing preparatory exercises this pose can be done with reasonable ease. These tips will help you on your way.
What is the Shoulder pose?
This is a basic pose; an inverted supine position. In yoga jargon this pose is called “Salamba Sarvangasana”. Salamba means “with support”. Sarva stands for “all” and Anga means “limb”. To get into Schouder asana you start from the Bride or Plow pose. The starting point with every yoga pose is always doing what feels right; respect the body and the limits it indicates. In the Shoulder pose, especially the monkshaper muscle (shoulder muscle) and some deeper muscles attached to the cranial edge are stretched intensively. The triceps support the body to stay upright in this asana. If the stretching of the legs does not feel comfortable, it is an alternative to keep the legs less upright or the knees slightly bent.
What is the effect of the Shoulder pose?
Salamba Sarvangasana is a good posture to increase flexibility in the shoulder muscles. In addition, it also has a positive effect on the muscles in your neck and contributes to reducing any tension that may occur there. The biggest challenge in this asana is being able to breathe freely. By raising the legs, there is more pressure on the diaphragm and organs, which reduces the freedom to breathe deeper. It is a matter of feeling how far the legs can be raised to breathe freely. The goal is not to get the legs straight up. The focus is on the shoulders and breathing freely. To be able to do the Shoulder pose, a good warm-up is required. That is why this posture is done halfway or towards the end of the a yoga class. These tips help to do the Shoulder pose.
Step by step getting in Shoulder pose
- Preparation
Good preparation is important. Peforming the sun salutation several times makes the body, muscles and joints ready for this posture. Do the sun salutation at least 10 times when you don’t do any other preparation postures.In yoga jargon we never say that we ‘do a pose’. We ‘come into the pose’. To get into Shoulder asana the Plow and the Bridge are nice starting positions where the last one is most challenging. - From Plow into Shoulder pose
When you are in Plow and your toes reach over your head towards to flow, you place your hands on your back. Make sure that the elbows rest on the floor so that the arms can support the heaviness of the body. Then bring the legs up and against each other one at a time. Alternatively, both legs can be raised simultaneously. By choosing this option, more strength is demanded from the core muscles. Press the legs and feet together when they are raised and bring them to a height so that the pressure on the diaphragm is sufficient to breathe easily. - From Bridge into Shoulder pose
Coming from the Bridge into the Shoulder pose is more challenging and requires more of the arms and abdominal muscles. When you are in Bridge, the arms are stretched, fingers intertwined and the hands rest on the floor. Bring your body weight on one leg, for example the left. On the in-breath you raise the right leg and then bring the right knee towards the chest. The hands come apart and place the shoulders firmly on the ground, push the hips further up. Place the elbows on the floor and the hands on the lower back. The right leg slightly backwards towards the head; the right knee is now above the face. Then bring the left knee towards the chest. Then place the hands higher on the back and stretch the legs and feet one by one and push together. Bring the chin towards the chest to release tension from the neck. Alternatively, the legs can also be stretched simultaneously.