The back muscles are one of the largest muscle groups the body has. Training this muscle group not only ensures a better posture, it also prevents injuries in the back, neck and shoulders during a sedentary occupation. In the yoga pose the Grasshopper the back muscles are optimally trained. In this blog post an explanation about this asana.
What is the Grasshopper?
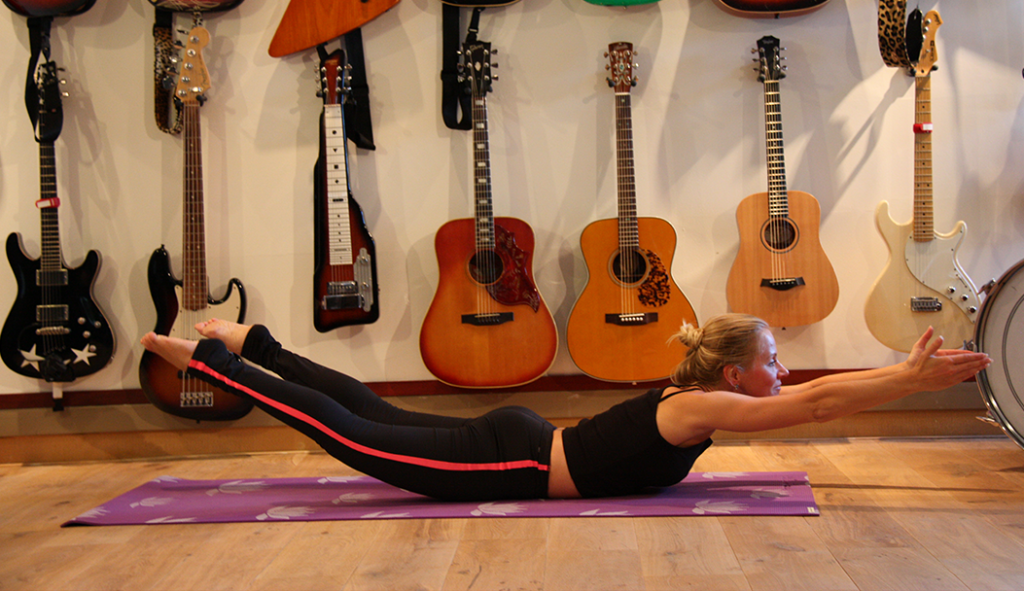
This is a basic pose; a symmetrical backward bend. In yoga jargon this asana is called “Salabhasana”. Salabha means grasshopper. In this pose, the arms and legs are removed from the ground and the body rests on the stomach. In addition to the back muscles, the large buttock muscles, hamstrings and calf muscles are also trained. The upper body, especially the triceps and shoulder muscles, are also activated.
What is the effect of the Grasshopper?
In this asana it is the intention to stretch the arms and legs completely. That can be a challenge because gravity gives resistance. When the legs are raised, they automatically turn outwards. By tightening the hamstrings the legs stay turned in which requires extra effort from the body. The higher the arms get off the ground, the more that is felt in the shoulders and neck. To counteract the pressure, the shoulders often pull towards the ears. The goal is to stretch the arms as far as possible and to keep the shoulders away from the ears. When the arms and legs are off the ground, the body rests on the stomach. The body can rock back and forth while inhaling and exhaling. The challenge is not to swing but to let the belly rest completely on the ground. The pressure on the stomach has a positive effect on the metabolism and massages the internal organs. In order to be able to stay in the pose and keep the arms and legs off the ground, it requires effort from the back muscles. The higher the arms and legs, the harder the back muscles have to work and the more intensive this asana will be.
How you do the Grasshopper
In order to be able to do the Grasshopper properly, the Cat posture is a good warm up exercise. This pose increases the flexibility of the back. After this posture, you put the body on the mat, arms stretched out in front of you, legs on hip width and chin on the mat to support the head. On an inhalation you bring the arms, head and legs off the ground. Make the arms and legs as long as possible and let the chin lightly point towards your chest so that there is no tension in the neck and shoulders. Tighten the hamstrings to keep the legs in the right position, push the shoulders away from the ears and hold the pose for a number of breaths.
Alternatives
When it does not feel good for the (lower) back, neck or shoulders, these alternatives can help:
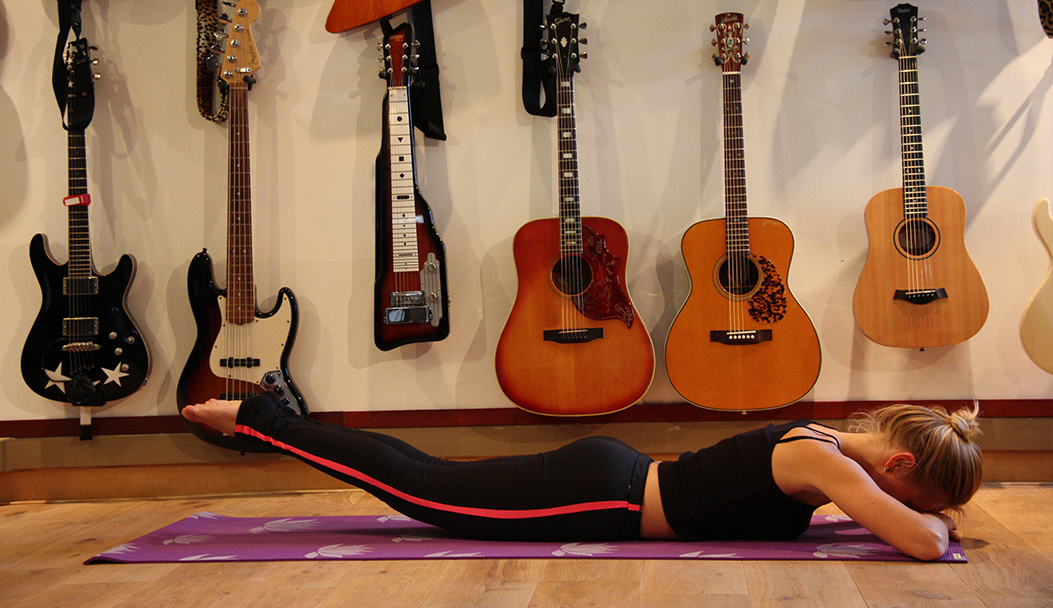
- Keep the arms and legs less high. It is not about getting it as far away from the mat as possible, it is about feeling how far your back can handle it and respecting that boundary.
- With a lot of tension on the (lower) back, neck and / or shoulders it can be nice to put the hands in front of you on the mat, put your hand together and let the forehead rest on the hands. And only keep the legs up.
- The legs are at hip width apart. An alternative to this can be to push them against each other, so you have more control and do the pose more easily.
