Actually, this yoga pose is not difficult to do, but it is difficult to perform well and to keep it going. In order to get and maintain the body in a straight line, concentration and control of breathing is necessary. Very easily you can stretch too far, or keep the hips too high or too low, reducing the effect of this pose. These tips will help you do the sideways plank correctly and with more ease.
What is the sideways plank?
This is a basic posture: a balance exercise on one arm. In yoga jargon this pose is called “Vasisthasana”. Vasistha means a sage; the best; the richest, the excellent. This asana is also called the ‘Attitude of the wise Visistha’. The biggest challenge in this pose is gravity, mental focus and maintaining a neutral axis of the spine. Due to the lateral posture, the muscles work against gravity. This requires effort from muscles and joints to stay in position.
What are the effects of the sideways plank?
This asana is an active basic posture and requires not only concentration of breathing, but also effort of the arms, stomach, chest, back, shoulder and leg muscles, and also of the hip and wrist joints and the vertebral column. In order to remain stable, the effort of many muscle groups is necessary and proper breathing is required. Good breathing (quietly breathing towards the belly) helps to maintain the pose for longer and is only possible when the body is and stays in a straight line. All muscles mentioned are trained in this pose which makes them stronger and gives an improved body posture and increases the overall condition.
This is how you do the sideways plank
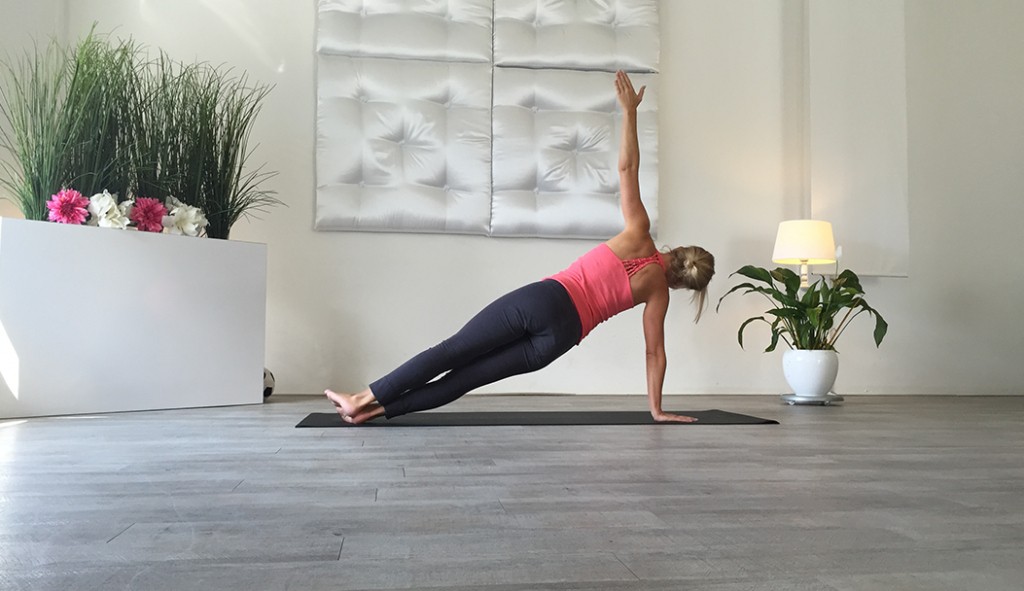
Vasisthasana can be done by starting from the ‘standard plank’ pose. The weight is on two arms, fingers spread on the mat, and the legs on hip width apart. You then let the heels fall from the foot to the left, so that the sides of the feet are on the mat. When you do this, all the weight automatically will shift to the left arm. Make sure that you do not ‘hang’ in your shoulder, but stretch the arm well and keep the shoulder away from the ear. On a next inhalation, raise your right arm and on the exhale you extend this arm upwards. You make a straight line with the whole body and hold this pose by breathing at ease. Then you bring the right foot on the left foot and push the legs together. To get a straight line, push the tailbone towards the feet so that you automatically bring the hips forward. Stay in the pose for a number of breaths before you change sides. First back in the standard plank pose and then you shift the weight on the right arm.
When the wrists and/or lower back are soft spots these alternatives can help you do the sideways plank with more ease:
Alternative for the wrists
Instead of putting the hand flat on the mat, you make a fist. This takes the pressure off the wrist.
Alternative for the back
When two legs on top of each other doesn’t feel good, you can keep the feet apart and place them on the mat. Or if you have the weight on the left arm, place the left knee on the mat. By doing this, the pressure on the (lower) back reduces.
When you practice this asana for the first time, the muscles can start to vibrate. That is a sign of effort. Concentrate on breathing to maintain in this pose and relax the muscles.
